Sunday, September 29, 2013

Fall Recipe: Crockpot Apple Cider

It is officially fall! However, Illinois did not get the memo and it has been around 80 degrees all week. No sweatshirt weather here, which is my favorite kind of weather. Keith is back to full time work and full time school, so our visiting hours are very limited. He asked if we could go to the apple orchard after work on Saturday, but everything closes at 6 and he didn't get home until 5:30. So, I decided to bring it to him. I went to the farmer's market in town and picked up two cider mill donuts. Then I made a pot of apple cider in my crockpot. It was super easy and really, really delicious.

Recipe: Crockpot Apple Cider


Ingredients: 
  • Apple juice (since it was only two of us, we got a small one)
  • Cinnamon sticks
  • Caramel Syrup
  • Crockpot
  • Mulling spices (optional, but delicious)
So, how do I make this delicious beverage?
Pour the apple juice into the crockpot. I have done this for a large crowd and used around 2.5 large bottles of apple juice, but this time it was only us so we went with a small bottle. Then add cinnamon sticks. Again, this depends on your crowd, for our small bottle we only put one in, for a larger bottle I would add 2. So, for around 2.5 of the larger bottles I added about 5 or 6 sticks in there. I also put in a tablespoon of mulling spices for good measure. Put the crockpot on high for about 1 hours, then low for 1 hour. (or you could do low for 3 hours, it's just to get the cinnamon and mulling spice flavor spread out through the drink).

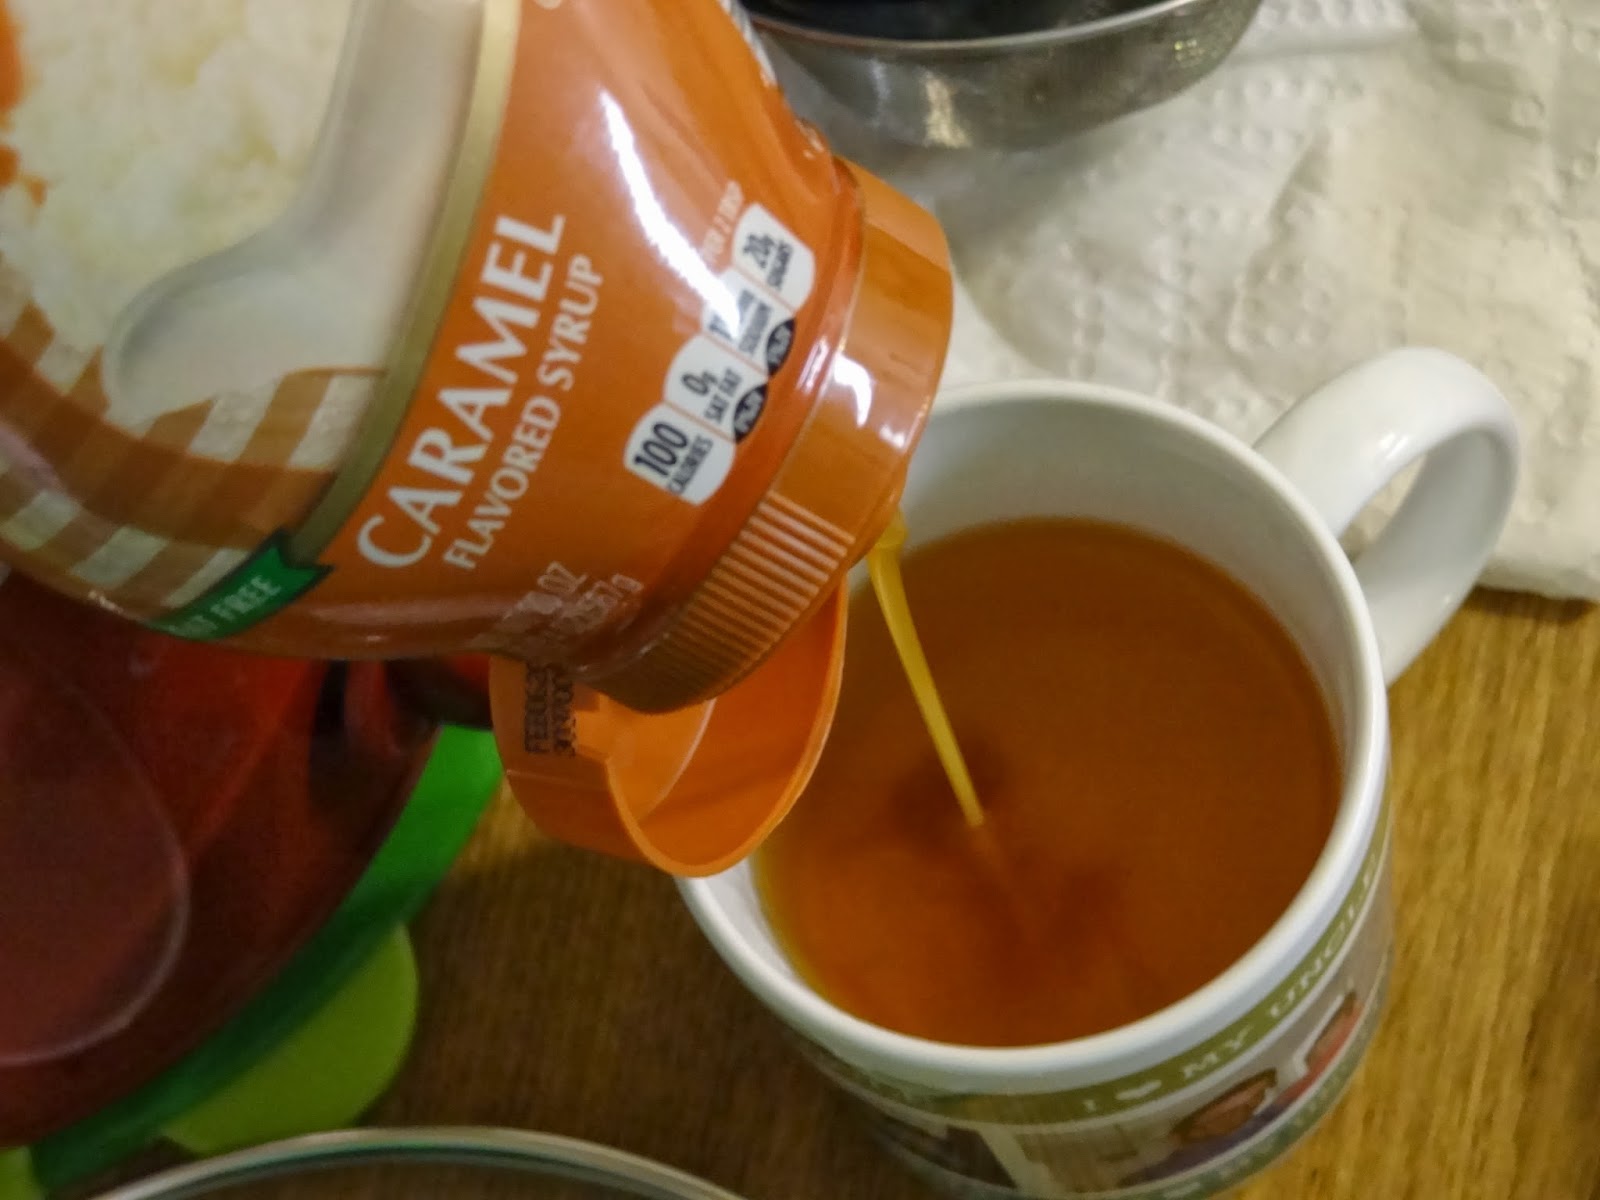
When its time to serve, I had to use a ladle and a sieve, to get out the larger pieces. Some recipes will tell you to put the caramel syrup into the crockpot and let it cook. I did that last time and it became almost like a pulp and didn't add anything for me. This time, I poured the warm apple cider in a mug, then put in the caramel syrup into my mug. It worked like a charm.


Optional, again: Keith and I had some caramel apple flavored vodka we had laying around and since we were staying in for the night decided to add some of that to our drinks. The result was delicious. But again, you need to drink responsibly and be over 21 to indulge :) 

Well, I am ready for the fall and hope you are now too with this recipe. Cheers.

Thursday, September 26, 2013

Recipe: Zucchini, blackbean and rice skillet

Late starts at work mean I get to post about the awesome dinner we made last night. Actually, Keith made most of it, I was just there for support. It was a very easy recipe and didn't take too long, however there were a few things we would have changed doing it a second time. Anyway, here we go!

Recipe: Zucchini, black bean and rice skillet

Ingredients:
1 tablespoon of vegetable or canola oil
1-1/2 cups of zucchini (we used wheels, I would cut it further)
1 cups of mix peppers (we got the pre-cut blend from the grocery store)
1 can of black beans, drained and rinse
1 can of diced tomatoes- we used chili style, however garlic ones would probably be good if you like garlic (we don't)
3/4 cup of water
1 cup of instant rice
1/2 cup of shredded cheese blend- we used cheddar and colby jack


Heat oil in skillet over medium heat. Add zucchini and bell peppers; cook 5 minutes stirring occasionally. Again, if we would do this over again we would cut the zucchini into small pieces.

Add beans, undrained tomatoes and water. Increase the heat and bring to a boil.

Add rice; stir well. Once rice is in, cover and remove from heat and let stand for 7 minutes or until most of the liquid is absorbed. This seems weird, but it will cook the rice. Uncover and sprinkle on cheese. Serve when warm. We got about 6 Jenn servings out of it, and about 5 Keith servings, so depending on your appetite you get quite a few servings out of it. With everything in it, it makes for a really good entree.


Enjoy :) (we sure did!!!)

Sunday, September 22, 2013

Back with some burlap

I apologize for the lack of posts from me over the last two weeks, however I have been pretty busy. This happened:

I will post more with the bits and pieces later, and about our awesome honeymoon in Disneyworld, that was so much fun I never wanted to leave and tried to convince Keith and my best friend to become costumed characters down there with me so we could stay there forever.

Anyway, when I got married, I wanted to add some Jenn details (as seen in my last wedding post). So Keith and I found some awesome cobalt blue burlap at Hobby Lobby. One of our colors was that exact blue! So I bought 10 yards of it, with a gift card I received, and we decided to wait to figure out what to do with it. (Note, this is NOT the best course of action, however it was our only real impulse buy for the wedding) We decided to use the burlap under our vases and table numbers at the reception. Then came the problem of how to cut it with the least amount of frayed ends.

So here is a tutorial on how to cut burlap that worked for us: 

 Get your burlap and a nice, sharp pair of scissors. My mom used to be a seamstress, these are her babies. Usually, use a cutting board, however I was too busy watching tv while doing this, so I did it on the floor.

 First step, find a string at the measure you want it. Mine were about 16 inches wide. Pull on that single string with even force, but nothing too hard or you will break the string in half.


Keep going, you might need to use your other hand to guide the string out. But at the end, you want a void, where the string was and that needs to go all the way through. Do you see the void where I removed the string? It should look like that.

 Then cut the burlap in the void where the string is no longer. MAKE SURE you only cut in that line or you will get more fray then you want.


There you have it a clean cut. It wasn't hard, just time consuming when you have to do 19.


And here is the finished product! I think they turned out pretty darn nice. :)


Okay, so I hope this tutorial helps with your burlap needs.

Tuesday, September 3, 2013

Recipe: Cinnamon Sugar Breakfast Muffins

I love cinnamon sugar anything. I found out we had a meeting at work and jumped at the opportunity to bake these cinnamon sugar mini muffins for the team (okay, or me...) They are simple to make, and really, really tasty. The only downside, I have a small kitchen and there are quite a few steps for these muffins. So it got a little tight in the kitchen, but it was so worth it. I mean, LOOK AT THEM. You can sees the deliciousness.


I know, beautiful. Okay ready to make them??

What you need:
  • 1/3 cup butter, melted
  • 1/2 cup of sugar
  • 1 egg
  • 1 & 1/2 cup flour
  • 1/2 tsp of salt
  • 1 & 1/2 tsp of baking powder
  • 1/2 tsp of cake spice (or 1/4 tsp of nutmeg, 1/4 tsp of cinnamon) 
  • 1/2 cup of milk
For topping:
  • 1/2 cup of sugar
  • 1/4 cup of butter, melted
  • 2 tsp. cinnamon (not going to lie, I usually do more)
How to make these:
 1.) Preheat the oven to 350. Mix together dry ingredients, including the cake spice.

 2.) In a separate bowl mix your liquid ingredients. I usually start with an egg and milk mixture, then slowly pour in the butter, whipping it the whole time so the egg does not get too warm from the butter. After I mix that up really well, pour it into the dry ingredients, and mix.

 3.) Do NOT over mix. The batter will still have some lumpy areas, but you just want to make sure it's all mixed together.

 4.) Use a scooper to dish out even portions.


 5.) Bake in the oven at 350 for around 10 minutes for the mini muffins, for full size do around 20-25. Of course do the toothpick test and make sure they are completely cooked. Allow to sit in the pan for around 5 minutes.


 6.) In a separate container melt your butter and set aside. In another bowl, mix together sugar and cinnamon. Take a muffin and roll the top and sides into the butter. Be carefully not to do this when the muffin is too hot or if you waited to long. It should be around 5-10 minutes out of the oven.

 7.) Once the butter is coating the areas you want to sugar cinnamon mixture to stick to, roll the muffin in the sugar mixture.

 8.) Place on drying rack to set, then EAT!

These little guys are a perfect sweet breakfast. I brought them in today and almost all of them are gone. Hope you enjoy this recipe! :)