It's been over a week since my last post! What? I have been very busy though, I promise. Since my last post:
-Keith had a birthday!
-I had a half birthday (not as exciting)
-I read two books and started a 3rd. So- that's like 12/13 more until I finish my challenge that I made in an earlier post.
-I reopened my etsy shop lokibean
-I have a new plan for my etsy store, and started working on it. The new stuff/updated store will be coming soon
-Keith built me a desk
-I am planning a party
And I have a full time job. So, busy. We are still finishing up odds and ends at the apartment too, which I just want done. This is a post about a simple storage solution that I wanted to share.
I love my apartment. I love it. But a huge downfall is the lack of closets, or storage. This is really true in the bathroom. We don't even have a medicine cabinet. First we bought a tall storage self from Ikea and got large boxes that fit the shelves and have lids. We store those thing we don't want people to see in those (toilet paper, medicine, razors, etc). However we ran out of room.
So, I went to the dollar bin at Target and bought skinny baskets with large holes and some 3m plastic hook.
Attach the plastic hooks to the inside of the bathroom counter and make sure they are properly placed. I make the locations using the basket as a guide and a pencil. They are pretty sturdy too. I store vitamins, hairbrushes, etc in them and they hold out.
This post seems like a goofy one, but I thought it was important to share this in case any of you are city livers like us and just don't have space.
Showing posts with label home decor. Show all posts
Friday, August 1, 2014
Thursday, July 10, 2014
D.I.Y. Word Wall Art
I don't read as much as I used to. I should, and I will try to work on that. Maybe I will set a goal- 15 books for the rest of the year. Is that a lot? I feel like I don't know because some books take me a day to finish and others seems to hang on with me for weeks. So, 15 minimum. Deal? I will keep you posted on my progress.
I have declared my love on this blog for a certain Mr. Hemingway. I still love him, don't worry. However, I was putting away some books and a few Vonnegut books appeared. I forgot how much I love Slaughterhouse-Five. I have kept this worn copy since high school. So, when I was thinking of wall art and thought of doing a simple word wall art- a light bulb went off in my head. So, I ran to the craft store (okay- I took the train to the craft store) bought small wooden letters, 2 different kinds of paint, a thin paint brush and all purpose glue. I had canvases at home. I headed back on the bus (don't ask!) and got to work once home.
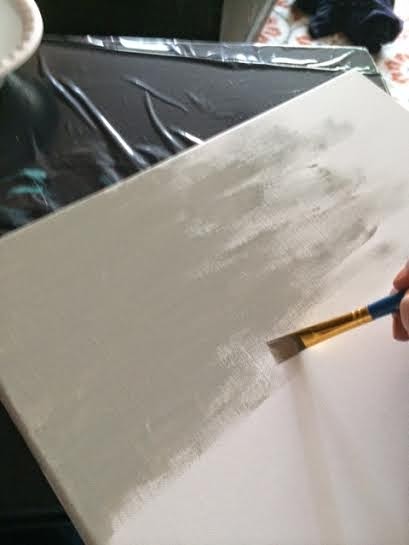
I wanted a lighter background- so that the letters were a little more dramatic. I also didn't want you normal straight paint job. So I got creative. I did one coat of the gray paint on the canvas.
Once it dried, I laid out my pattern- then glue them on individually. I let that dry, and there you have it a new wall art!
It's a bit dark-a bit weird, but I like it. It's a good reminder.
Okay, well this is my easy wall art. I really enjoyed making it.
Happy crafting!!!
Labels:
art,
art project,
canvas,
d.i.y.,
decor,
diy,
home decor,
paint,
wall art
Friday, March 28, 2014
How to: dishwasher magnet
So, I don't like doing dishes. There I said it. However, they won't do themselves, so I needed to figure out a way to know when I needed to do them. Keith has a weird schedule this semester, and some notes I am already in bed by the time he gets in. He usually is the one to start the dishwasher and because we have such a small place and the dishwasher is right next to where we watch tv, he always starts it at night so it won't be loud while we are talking or catching up on our stories. Well, this is very nice of him but because I am usually in bed, I never know if the dishes are clean or dirty to load or unload it. So, today I decided to make us a little tool to help us out. The fantastic clean/dirty dishwasher magnet.
Here's how!
| First step- position the words how you want them. Remember, they have to be facing opposite ways. |
| I marked where I wanted the word to end on the wood base for when I started gluing the letters. |
| Hot glue the letters |
| Make sure they line up with the line you drew |
| Continue until you have one word done. Turn over the wood base and start on the second word. I found it was easiest to work backwards. |
| After gluing letters, get off all the stringy hot glue. |
| Once dried, flip it over and peel of the sticker on the self-sticking magnet. I attached one on each corner. |
| It holds like a champ . |
Happy crafting!
Subscribe to:
Posts (Atom)