Showing posts with label d.i.y.. Show all posts

Wednesday, July 16, 2014

a small ikea hack

So, Keith and I are adjusting to our new home. It's a lot bigger then we thought, which is a great problem to have. But we have less closets, so we are trying to make due. We went furniture shopping and came up with a great solution... an Ikea hack.

So we bought a few of these

We got black and gray tables, and Keith set to work to create a fun new shelf by stacking two lack tables together. He first took the dremel with the sanding attachment to the corners where the legs would hit the top of the first table. He ground it down and then put wood glue down to create a two tiered shelving unit. It took overnight to dry, but we kind of love how it turned out!

Yup, that little guy is Bertie- our fat butterfly from New Orleans. 

This project is really easy and it's easy to do. We hope you enjoy our creative solution to our lack of shelving.


Sunday, July 13, 2014

D.I.Y. Permanent Marker Dyed Scarves

I have had several silk scarves for two moves now and when I started to unpack in my new apartment, I finally found them and decided to do something with them. So I invited my friend Erin over and we decided to craft- so we dyed silk scarves with permanent markers.

This is an easy craft but a beautiful craft. All you need is a silk scarf, I got mine here, permanent markers, isopropyl alcohol and a dropper. I also used garbage bags/table clothes to protect the table. 

First things first, iron the wrinkles out of your scarf, then fold scarf into a triangle.

Then start creating whatever pattern you would like with colors. Make sure the ink goes all the way through to the back of the triangle.
I unfolded the triangle and added more color where I felt it was lacking. I also rubbed the ink into the silk. It dyes your fingers, but I thought it really worked.


Once I liked the designed, I refolded it into a triangle and went outside. This next part is a bit strong smelling- so do it outside or in a well ventilated area.


Once outside (and on some protective tablecloth/garbage bag) use a dropper to get out some isopropyl alcohol and slowly drop the alcohol on the ink.


The ink will spread out, so continue until its well spread and looks the way you want it to.


 I flipped it over and did both sides. You might even need to open it and continue to drop the alcohol to spread more of the ink.

Erin made a scarf too. How beautiful!


Let your scarves dry. The alcohol will dry quickly. Once it's dry, iron the scarf. I put a sheet between the iron and the scarf so it did not melt, but it really worked.


This is the final project. Turned out great! This is a hand wash only project. I just washed mine this morning and it bleed just a small amount but the pattern stayed intact. This project was really fun. I can't wait to do it again.

Happy crafting!


Thursday, July 10, 2014

D.I.Y. Word Wall Art

I don't read as much as I used to. I should, and I will try to work on that. Maybe I will set a goal- 15 books for the rest of the year. Is that a lot? I feel like I don't know because some books take me a day to finish and others seems to hang on with me for weeks. So, 15 minimum. Deal? I will keep you posted on my progress. 

I have declared my love on this blog for a certain Mr. Hemingway. I still love him, don't worry. However, I was putting away some books and a few Vonnegut books appeared. I forgot how much I love Slaughterhouse-Five. I have kept this worn copy since high school. So, when I was thinking of wall art and thought of doing a simple word wall art- a light bulb went off in my head. So, I ran to the craft store (okay- I took the train to the craft store) bought small wooden letters, 2 different kinds of paint, a thin paint brush and all purpose glue. I had canvases at home. I headed back on the bus (don't ask!) and got to work once home. 

I pulled out the good "S-O-I-T-G-E"s and assembled my saying. So it goes. Simple, elegant, reminder, motto. I painted the letters two coats of this bright aqua.

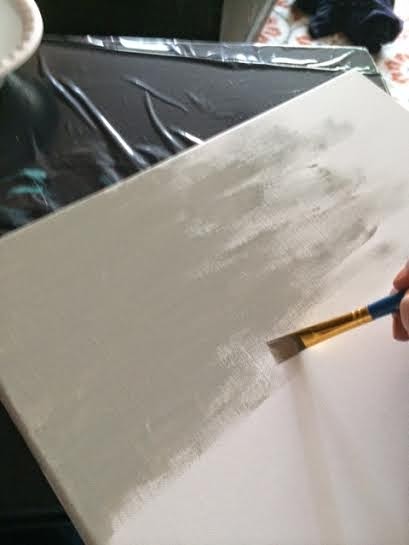
I wanted a lighter background- so that the letters were a little more dramatic. I also didn't want you normal straight paint job. So I got creative. I did one coat of the gray paint on the canvas.


Once it dried, I laid out my pattern- then glue them on individually. I let that dry, and there you have it a new wall art!


It's a bit dark-a bit weird, but I like it. It's a good reminder.


Okay, well this is my easy wall art. I really enjoyed making it.

Happy crafting!!!


Sunday, May 11, 2014

DIY Easy Paper Banner

 Our days are numbers in our apartment and while we pack up, things are getting into boxes or in some cases, rediscovered before getting put into boxes. I found some scrapbook paper and decided to make a festive banner that will go with us to our new home. It's a really easy how-to so I thought I would share how I made it.

What you need:
  • Bunting template from online or make your own. It helps if it has a fold over portion 
  • scrap book paper, I had three different patterns
  • scissors
  • string/baker's twine
  • tape (not pictured)
Use your template to cut out triangles. I cut out nine total.

Fold over the excess at the top to create a flap to hide the string.

Tape the flap down and make sure the string is under flap.

And there you have it! Simple, easy and fun paper bunting.


Friday, March 28, 2014

How to: dishwasher magnet


So, I don't like doing dishes. There I said it. However, they won't do themselves, so I needed to figure out a way to know when I needed to do them. Keith has a weird schedule this semester, and some notes I am already in bed by the time he gets in. He usually is the one to start the dishwasher and because we have such a small place and the dishwasher is right next to where we watch tv, he always starts it at night so it won't be loud while we are talking or catching up on our stories. Well, this is very nice of him but because I am usually in bed, I never know if the dishes are clean or dirty to load or unload it. So, today I decided to make us a little tool to help us out. The fantastic clean/dirty dishwasher magnet.

Here's how! 

This is what you need: a hot glue gun, scrabble letters spelling out clean & dirty (our game was missing pieces so I didn't feel too bad pulling out these letters), self sticking magnets and I got a wood base that I painted gray.

First step- position the words how you want them. Remember, they have to be facing opposite ways.

I marked where I wanted the word to end on the wood base for when I started gluing the letters.

Hot glue the letters

Make sure they line up with the line you drew

Continue until you have one word done. Turn over the wood base and start on the second word. I found it was easiest to work backwards.

After gluing letters, get off all the stringy hot glue.

Once dried, flip it over and peel of the sticker on the self-sticking magnet. I attached one on each corner.
 
It holds like a champ .


This is a pretty easy thing to make and it's so useful. I am not sure why I haven't made it before!

Happy crafting!

Thursday, March 13, 2014

Spring Wreath

I give you the next installment for Craft Month, my spring wreath! 

Look at how cute this is!


 What you need:
  • A wreath blank
  • green fur yarn
  • flower ribbon
  • hot glue gun
  • scissors (not shown)


To start, hot glue the end of the fur yarn to the Styrofoam wreath mold. Then start wrapping. This project take patience. A LOT of it. Every few inches put a drip of hot glue on the back and wrap the fur yarn over it. Careful not to burn your fingers on the hot glue. (I did...)

Keep wrapping and gluing. Every once in awhile run your hand over the fur that is already wrapped around to fluff up the fur. 

Keep repeating

And repeating....

Once you finish wrapping the wreath, cut out the individual flowers. I cut out around 12. Hot glue them to the front of the wreath, wherever you would like. Then tie on a ribbon to hang and:

Ta-DA!

This project does take time and patience. I really enjoyed it though and the final product is just so cute. Happy crafting!


Sunday, March 2, 2014

D.I.Y. Wire Wrapped Ring


March is National Craft Month! Did you know that? Megan shared the news to me this morning in a text message. So, I stopped procrastinating and put together a post that I hope you enjoy.

Keith and I visited the Art Institute in Chicago for my birthday. I fawned over ancient Greek pottery, became absorbed in Monet's paintings and devoured a delicious chai tea while overlooking their modern wing. It was the best. And this happened:


What.a.babe.

While, I was walking through an exhibit about Greek and Egypt and came across these two tiny wire wrapped ring of gold. I got really excited and pointed them out to Keith because I have been making these wire wrapped rings for a few years now and it was fun to see such early examples of them. So, I decided to try and make a tutorial on how to make them on this blog. It seems really complex, but it's not, I promise and soon you will be whipping them out in under three minutes.


 Okay, you ready? Let's go.

 You need:
  • A bead
  • Wiring, usually I get 18 gauge
  • A mandrel (this you might need to order online)
  • pliers (any craft store has)
  • cuter (any craft store has)
  • wire straightener (most craft store have this)


Cut a length of about two to three feet of wire. For a good rule of thumb if you are doing a full wrap, go three feet, only half or smaller go two. I usually just measure with arm spans. Once cut, straighten wire, by holding on end and running the straightener through the wire around three times. Try to get out all the kinks and this will make it a bit stronger too.


Move the bead to the center of the wire, and fold the wire gently to make a small indentation around the wire. Like so:


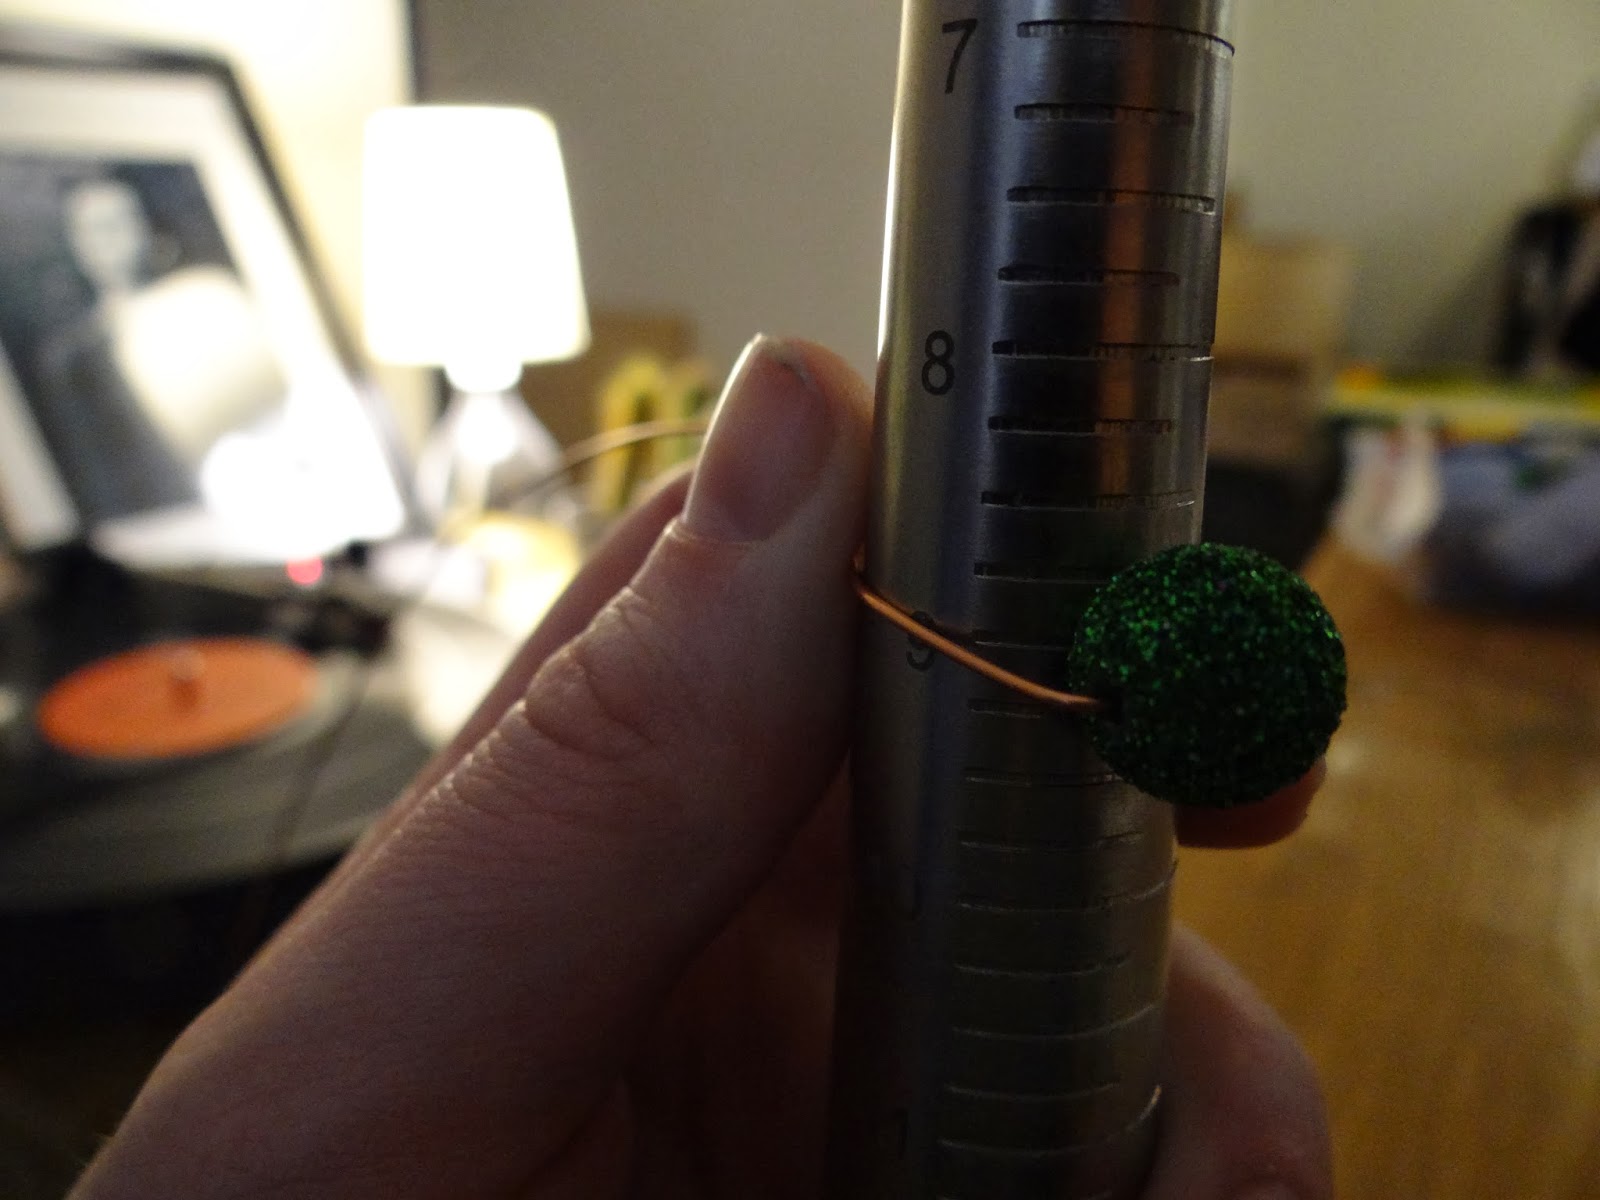
Place the bead on the mandrel. Make sure you place it on the size that you want to make it, then if you are wire wrapping only half, add half a size. If you are doing a full wrap, add one size. Once the bead is on the right notch on the mandrel, pull both sides of the
wire to the back end.


Wrap the wires around the back end so they cross over, like so.

Take one side of the wire and place over the bead, the other side goes under.

Take one of the ends and start to wrap around just the bead.

Once you have a good three or four loops around the bead, start with the other side of the wire and do the same amount.


Remove from the mandrel, and it should look like this.

Pick one side and start wrapping the wire around the base in small tight coils. You should be able to do this with your hand, but some gauges might need some pliers help. I always take the loose wire and wrap by going through the hole to the outside, like so:


Once you get one side, repeat with the second and try to make them even.


Clip off the extra wire and use your pliers to push the rough edges down so they will not hurt you when you wear them. Repeat on both sides.


There you have it!


I hope you enjoy making these. I love working with metal, so I find these rings easy and fun to make, and weirdly calming to make as well. I am sorry for the format of this post, I was trying out new things and I wasn't getting what I wanted, however I thought it looked okay. I promise I will figure out how to blog better one of these days. Until then, happy crafting!