Sunday, July 20, 2014

recipe: delicious waffles recipe for two

Guys, I really like waffles. Every weekend when we lived out in the burbs, Keith made me waffles. You see, we went from not having a single day off together to having Sundays together. It was like a special treat! So, to spoil me, he made me waffles for our Sunday breakfast. And then he went above and beyond by buying me a mickey shaped waffle iron. 

WHAT? I know, great husband, right? So, anyway- yesterday I was a bit down so he whipped me up a batch of waffles to cheer me up. It worked. Here is his easy (but tasty!) recipe for two people!

What you need:
 
Dry Ingredients:
  • 1/2 tsp salt
  • 1 tsp Cinnamon
  • (Optional) Dash of Nutmeg
  • 2 tsp Baking Powder
  • 1 Tbsp Sugar
  • 1 Cup Flour
Wet Ingredients
  • 2 Tbsp melted Butter
  • Vanilla (to Taste)
  • 3/4 Cup of milk
  • 1 Egg
Equipment: Waffle iron

Sift together all the dry ingredients, then add in the wet ingredients.  Scoop into the waffle iron and cook until finish.

I am not the biggest syrup fan, so I put on powdered sugar. Delicious!

Hope everyone has a GREAT week!


Wednesday, July 16, 2014

a small ikea hack

So, Keith and I are adjusting to our new home. It's a lot bigger then we thought, which is a great problem to have. But we have less closets, so we are trying to make due. We went furniture shopping and came up with a great solution... an Ikea hack.

So we bought a few of these

We got black and gray tables, and Keith set to work to create a fun new shelf by stacking two lack tables together. He first took the dremel with the sanding attachment to the corners where the legs would hit the top of the first table. He ground it down and then put wood glue down to create a two tiered shelving unit. It took overnight to dry, but we kind of love how it turned out!

Yup, that little guy is Bertie- our fat butterfly from New Orleans. 

This project is really easy and it's easy to do. We hope you enjoy our creative solution to our lack of shelving.


Sunday, July 13, 2014

D.I.Y. Permanent Marker Dyed Scarves

I have had several silk scarves for two moves now and when I started to unpack in my new apartment, I finally found them and decided to do something with them. So I invited my friend Erin over and we decided to craft- so we dyed silk scarves with permanent markers.

This is an easy craft but a beautiful craft. All you need is a silk scarf, I got mine here, permanent markers, isopropyl alcohol and a dropper. I also used garbage bags/table clothes to protect the table. 

First things first, iron the wrinkles out of your scarf, then fold scarf into a triangle.

Then start creating whatever pattern you would like with colors. Make sure the ink goes all the way through to the back of the triangle.
I unfolded the triangle and added more color where I felt it was lacking. I also rubbed the ink into the silk. It dyes your fingers, but I thought it really worked.


Once I liked the designed, I refolded it into a triangle and went outside. This next part is a bit strong smelling- so do it outside or in a well ventilated area.


Once outside (and on some protective tablecloth/garbage bag) use a dropper to get out some isopropyl alcohol and slowly drop the alcohol on the ink.


The ink will spread out, so continue until its well spread and looks the way you want it to.


 I flipped it over and did both sides. You might even need to open it and continue to drop the alcohol to spread more of the ink.

Erin made a scarf too. How beautiful!


Let your scarves dry. The alcohol will dry quickly. Once it's dry, iron the scarf. I put a sheet between the iron and the scarf so it did not melt, but it really worked.


This is the final project. Turned out great! This is a hand wash only project. I just washed mine this morning and it bleed just a small amount but the pattern stayed intact. This project was really fun. I can't wait to do it again.

Happy crafting!


Thursday, July 10, 2014

D.I.Y. Word Wall Art

I don't read as much as I used to. I should, and I will try to work on that. Maybe I will set a goal- 15 books for the rest of the year. Is that a lot? I feel like I don't know because some books take me a day to finish and others seems to hang on with me for weeks. So, 15 minimum. Deal? I will keep you posted on my progress. 

I have declared my love on this blog for a certain Mr. Hemingway. I still love him, don't worry. However, I was putting away some books and a few Vonnegut books appeared. I forgot how much I love Slaughterhouse-Five. I have kept this worn copy since high school. So, when I was thinking of wall art and thought of doing a simple word wall art- a light bulb went off in my head. So, I ran to the craft store (okay- I took the train to the craft store) bought small wooden letters, 2 different kinds of paint, a thin paint brush and all purpose glue. I had canvases at home. I headed back on the bus (don't ask!) and got to work once home. 

I pulled out the good "S-O-I-T-G-E"s and assembled my saying. So it goes. Simple, elegant, reminder, motto. I painted the letters two coats of this bright aqua.

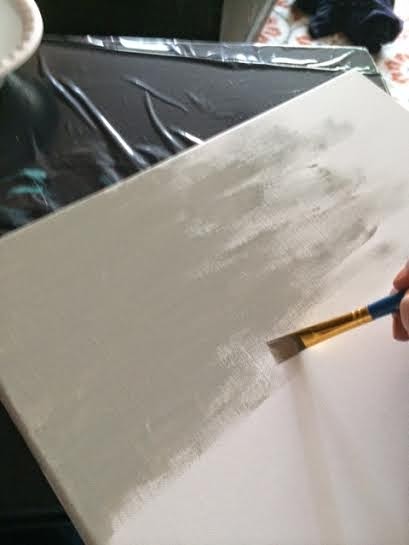
I wanted a lighter background- so that the letters were a little more dramatic. I also didn't want you normal straight paint job. So I got creative. I did one coat of the gray paint on the canvas.


Once it dried, I laid out my pattern- then glue them on individually. I let that dry, and there you have it a new wall art!


It's a bit dark-a bit weird, but I like it. It's a good reminder.


Okay, well this is my easy wall art. I really enjoyed making it.

Happy crafting!!!


Tuesday, July 8, 2014

Toddler Activity- shaving cream art


Guys, I love being an aunt. I have three nieces. My oldest niece is also my goddaughter. She's a beautiful, fun-loving spirit who reminds my family of a young version of me. She is two and a few months. I went home last weekend and the two of us played a lot.

Being an educator- I want to teach her how to world works, how to see art in everything, how to explore and investigate and never stop asking questions. But she's two. And I'm her aunt, not her educator. I want to give her cuddles and dress her in princess dresses and tell her how important she is to me. This weekend we tried a bit of both- I dressed her in my dress which she declared "Too big!" and then we played with a tactile activity. This is a great toddler activity- we tried to do low mess because she is not big on messes. 


I put out a plastic table cloth and bought a thing of shaving cream from the dollar store. I warned her first that we would get "a little" messy and to ask her dad if it was okay. After we got the all clear, we headed outside for fun. I piled high some shaving cream and demonstrated to move it around. Shortly, she was squishing and moving and painting with me. Although, halfway through she asked my mom to clean her up then went back at it- it was a great time. We did hand prints, traced letters, and made pictures. 

She got really into it and said she had fun, and I believe her because why would a toddler lie? I would recommend this as a good toddler craft when you need a little bit of not-too-messy arts and crafts time. If you are feeling daring- add a drop of food coloring. The shaving cream comes off really easy, however you smell like a newly shaved dude for a bit- even after washing your hands. 

And, as an aunt and educator- please, keep exploring. You will discover so much.


Sunday, July 6, 2014

Easy breakfast


This weekend has been great! As it comes to a close, Keith and I decided to make breakfast today before we start the work week. Keith made bacon, I made a smoothie and these delicious rolls- they are SO easy! Recipe to follow:


What you need:
  • A roll of Grands rolls
  • 1/2 cup of sugar
  • 2 tbsp of ground cinnamon
Preheat oven to what it says on the Grands tube. Spray cookie sheet with nonstick spray. Mix the sugar and cinnamon in a shallow dish. Remove the Grands and put them in the sugar/cinnamon mixture. I made sure I got all sides, including the sides. Repeat until you get all of them. Cook them around 14 minutes. Enjoy :)


Tuesday, July 1, 2014

and, we're back!

Sorry I have been away but I am now comfortably resting in my new apartment in Chicago! I love it and Keith and I are settling in quite nicely. I will post more about that when we are fully settled. Until then- a quick post about a new treat we discovered on our vacation

Keith and I went to Mackinac Island with my family. I love the Island, and really think of it as my home. We got engaged on the island, I lived on the island and I spent my childhood visiting the island. I know every inch of it. We met up with friends and went to a favorite for drinks and I found this on the menu: adult rootbeer float. I have to say- I was pretty stoked.

It was so good I wanted to make it at home. So I did!

Add 1.5 ounces of whipped cream vodka over ice. Fill cup with rootbeer and add a splash of cream. Delicious.

Enjoy and drink responsibly. I will post again soon!